
 English
  Polski
  Deutsch
  Nederlands
  Svenska
  Norsk
Norsk  Dansk
Dansk  Français
  Italiano
  Español
  Português
  Slovenčina
  Suomi
Suomi  Gaeilge
 Simple Pepper Pruning and a Home Trick That Doubles the Harvest
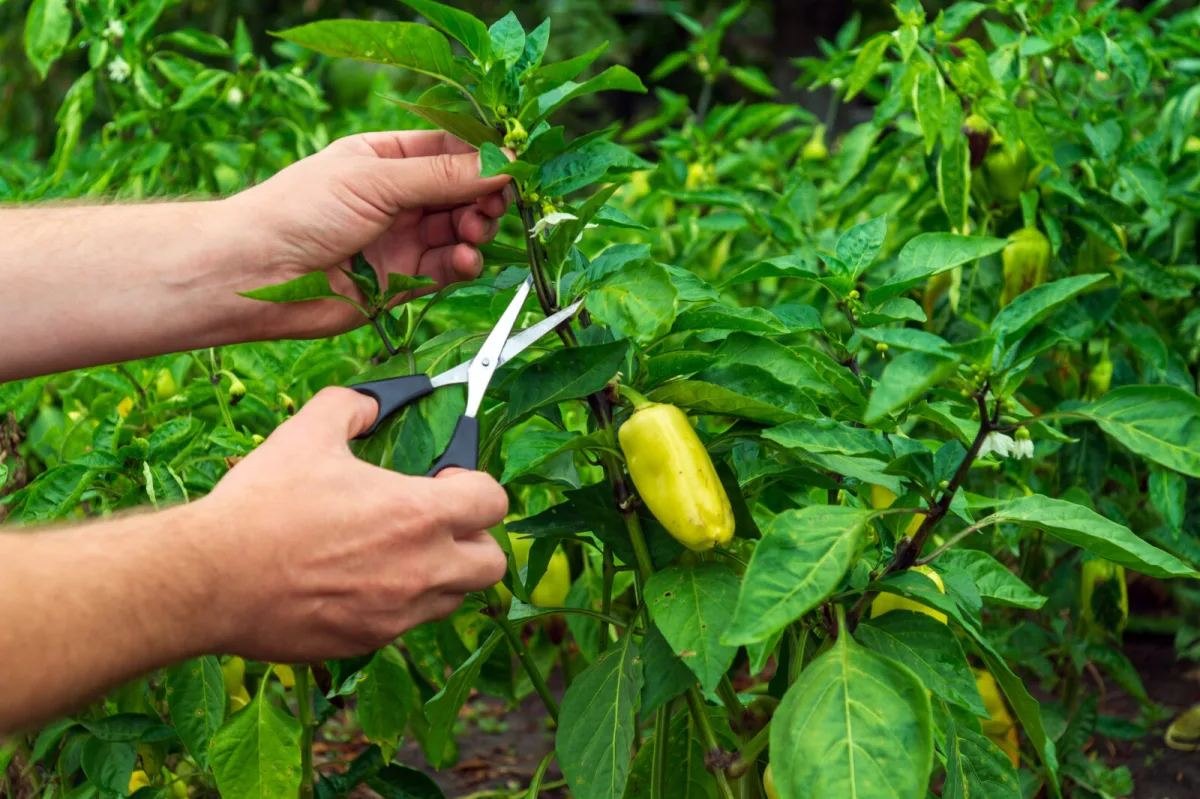
Just like tomatoes, peppers produce side shoots known as secondary shoots. At first glance they seem harmless, but they unnecessarily sap the plant’s strength. They take water and nutrients, thicken the bush, and the result is often poorer fruit set, smaller peppers, and slower ripening. If you shape the plant in time, its energy is channelled into a few main branches and it crops more steadily with better-quality fruit.
The basic rule for pruning peppers
The aim isn’t to restrict the pepper, but to give it a clear structure. In practice, it usually works best to keep only 3 to 4 main shoots. This way the plant has enough leaf area for photosynthesis, but it doesn’t become overgrown and waste energy producing more and more green growth. The job is simple, but it needs doing regularly, because new side shoots keep appearing throughout the season.
What to remove first
Start by removing all secondary shoots growing below the first fork. These low shoots are typically the biggest burden: they draw nutrients but often don’t deliver a worthwhile crop. At the same time, it’s recommended to remove a few of the lowest leaves, usually 3 to 4, to improve airflow and reduce the risk of disease.
Shoots between the main branches
The next step is pinching out or cutting off shoots that grow between two main branches. This growth thickens the plant, creates shade, and the pepper then often puts energy into foliage rather than fruit. Use a sharp tool, ideally disinfected, so you don’t introduce infection into the wounds.
When it makes sense to remove flowers too
If your peppers are growing in soil that’s low in nutrients, it can pay to remove the first flowers that form on the main stem up to the first node. These early flowers can slow the plant down because it spends a lot of energy on them at a time when it still doesn’t have enough roots and leaves. Remove the buds only up until they open. If, on the other hand, the soil is fertile and the plants are growing strongly, there’s no need to interfere with the flowers and you can leave them.
How to keep peppers in an ideal shape
If you want to keep three main shoots, choose a strong, forked branch in each direction and remove the other excess growth. On fruiting branches, it’s best to keep the flowers, but manage growth so the plant isn’t overloaded. A practical guideline is to leave one bud and two leaves at a given point to feed the developing fruit. Because secondary shoots never stop forming, check plants regularly and keep pinching out new side growth as it appears.
A homemade fertiliser to support growth and fruit set
Alongside pruning, targeted feeding can make a big difference. A simple mix of pelleted or dried chicken manure provides peppers with nitrogen and other nutrients, while garden chalk adds calcium and also helps slightly reduce soil acidity. This combination supports growth, strengthens plant tissues, and improves overall plant vigour.
How to make a basic concentrate
Mix pelleted or dried chicken manure with water at a ratio of 1:10. With pellets, it’s enough to let the mixture stand for about 12 hours, stirring occasionally. If you use fresh manure or dried manure in a coarser form, it’s better to let the mix ferment for 7 to 14 days in a plastic container, stirring regularly as well.
Dilution and application at the roots
Add about 1 litre of the prepared concentrate to 10 litres of water, then add and mix in 1 cup of grated garden chalk. Stir thoroughly so everything combines evenly. Apply the feed directly at the roots, about 1 litre per plant. It’s best to water onto moist soil so the roots aren’t scorched and the nutrients are absorbed well.
When to repeat the dose
If your soil is noticeably more acidic or the plants look weak, you can repeat the feeding after 7 to 10 days. With correct pruning and regular checks for side shoots, peppers usually reward you with stronger growth, better fruit set, and longer-lasting production through the season.
Tip: Consistency makes the biggest difference. A one-off prune helps, but the best results come from continually pinching out new shoots and feeding sensibly according to the plant’s condition.
Source: Gardeningn Know How, The Spruce, To je nápad, Pestrazahrada.cz

A lover of nature, gardens, and everything that moves, blooms, or grows. He literally grows everything, from herbs to rare species, and he enjoys caring for animals just as much. In his work, he connects modern technology with tried-and-tested grandmotherly methods and is happy when both paths lead to the same goal.
Related articles
Next year you can harvest better if you don’t sow carrots where they won’t thrive
Carrot root fly can ruin carrots, parsley and celery from the inside out, often without obvious warning until harvest. Better site choice, rotation, later sowing and simple physical barriers can dramatically cut damage next season.
How to Propagate Roses from Cuttings at Home and Fill Your Garden with Blooms Almost for Free
Want more roses without paying for new plants? With a few healthy cuttings and a simple plastic-bottle mini greenhouse, you can root new bushes at home in just a few weeks.
Heathers can cope where other plants won’t, but one soil detail decides everything
Heathers and heaths are tough evergreen shrubs that can flower across the seasons when you choose the right types. Success hinges on matching the plant to your soil pH and ensuring free drainage.
Comments (0)
Be the first to comment.